For the complete documentation index, see llms.txt. The full corpus is available at llms-full.txt. This page is also available as Markdown by appending
.mdto the URL.
Getting started
At the end of setup you have three things: a handle at realhandles.com/<you>, an Ed25519 signing key that only you hold, and a signed file that ties the two together and can be checked by anyone, with no help from us.
Do it in this order
Section titled “Do it in this order”Verify at least one account before you pick a handle. The handle gate reads the proofs already attached to your login, so a handle of 8 characters or fewer is only offered once you hold a matching proof. Proofs are stored against the login, not against an identity, which is exactly why you can verify before you have claimed anything.
If you would rather not decide yet, onboarding fills in a long default handle for you. Long handles are open to anyone, so nothing is at stake in taking one, and you can move to a short one later once you have proved it.
Setting up
Section titled “Setting up”- Sign in. This answers one question: which identity row you are allowed to edit. It never signs anything on your behalf. See Your signing key.
- Verify an account. GitHub, X, YouTube, Bluesky, TikTok, a domain, a wallet, a Nostr key. See Verifying an account.
- Pick a handle. The tier is decided by length. See the table below.
- Make your key. It is generated in your browser. You choose an Unlock Phrase and download an Identity Backup file.
- Publish. Your key signs a manifest listing your accounts, and that signed file becomes your public proof.
Claim your handle, on the Identity tab, is the same five steps in the same order. Pick the name, the phone generates the key, you set an Unlock Phrase and save the Identity Backup somewhere that is not the device, and only then is the handle claimed and the public key registered. The private half never leaves the device.
If you already have an identity, do not make a second key. Move the one you have: on realhandles.com open the Profile tab, choose Show as QR code, and scan it from the Keys tab in the app. See Your signing key.
Publishing is Publish & re-sign on the Identity tab, and it needs the key on the device and unlocked, which is the same rule the website follows.
Which handles you can take
Section titled “Which handles you can take”| Length | Tier | What it takes |
|---|---|---|
| 9 or more | Open | First come, first served. A matching proof adds a namesake badge. |
| 3 to 8 | Protected | One matching verified account on a key platform, or a matching domain you control. |
| 1 to 2 | Reserved | A strong match: a matching .com, or a matching handle on X, YouTube, TikTok, Instagram, or LinkedIn. |
A match means the proof carries the same name as the handle: @ben on X for /ben, or ben.com for /ben. Cheap TLDs score below the protected threshold on purpose, so nobody takes a scarce name by spending a dollar on a domain. The scarcity is borrowed from the source platform: @ben on X is globally unique and hard to get, which is what makes holding it a real claim to the name.
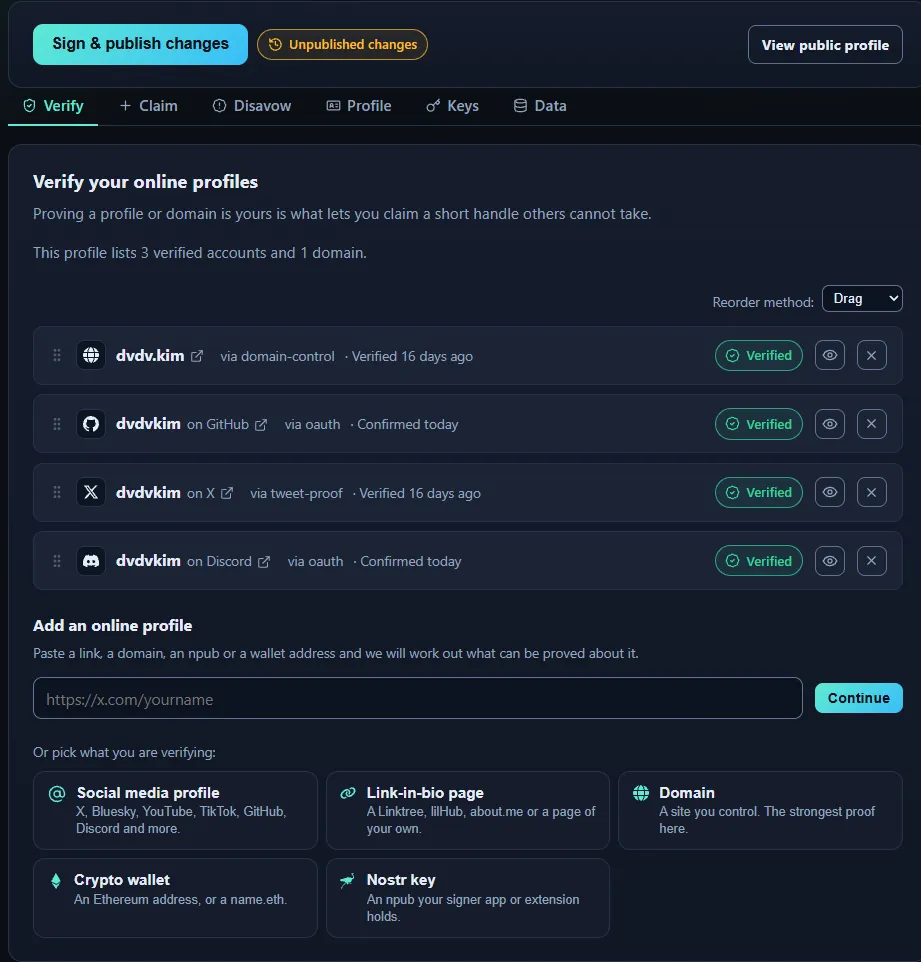
The dashboard once the key is unlocked. Everything you can change lives under one of those five tabs, and the sign button at the top is what makes any of it public.
Save exactly two things
Section titled “Save exactly two things”- Your Identity Backup, plus the Unlock Phrase. The file is useless without the Unlock Phrase, and the Unlock Phrase is useless without the file. Keep the file somewhere that is not the device you use every day.
- Your Emergency Kit. It is a key you designate in advance, published inside your manifest, and it is the only way back in if the signing key is gone. See Recovery and rotation.
The part that surprises everyone
Section titled “The part that surprises everyone”Changing something on RealHandles does not change your proof. An added account, a new anchor, a reordered list: all of it lands on realhandles.com immediately, and reaches your signed proof only when you publish again and your key signs the new version. Until you do, anyone verifying you sees the previous version, which is the correct answer to give.
The signed manifest explains why it works that way.
What you end up with
Section titled “What you end up with”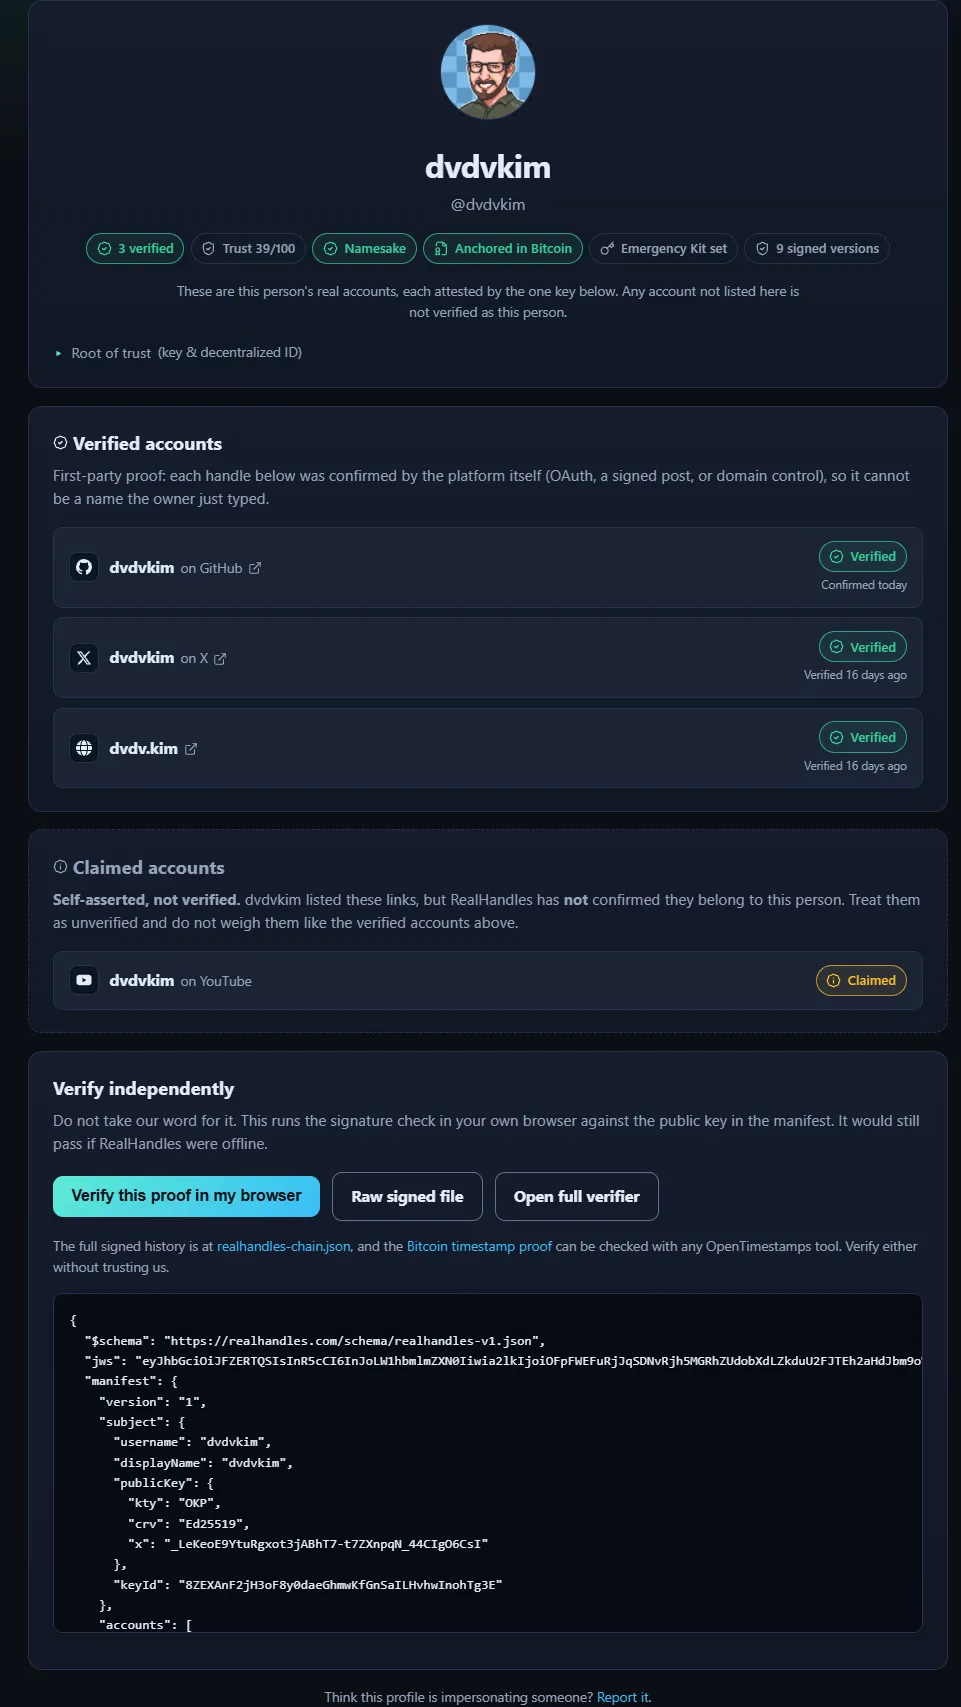
Verified accounts sit above claimed ones, under separate headings, with the badges that say what has been checked: how many accounts are verified, the trust score, whether the handle is a namesake, whether the history is anchored in Bitcoin, and how many signed versions exist.
Where to go next
Section titled “Where to go next”- Verifying an account for a stronger handle or a higher trust score.
- Claiming an account for the platforms that cannot be verified at all.
- Disavowals if somebody is already impersonating you.
- Your signing key for what you are actually holding.
- Reading the history for how to audit an identity, including somebody else’s.
- Exporting your data for every file you can take with you.